DIY silicone sex toy
After opening Blender, first press shortcut A to select all items, including the default cube, and then delete them all with the Delete key.
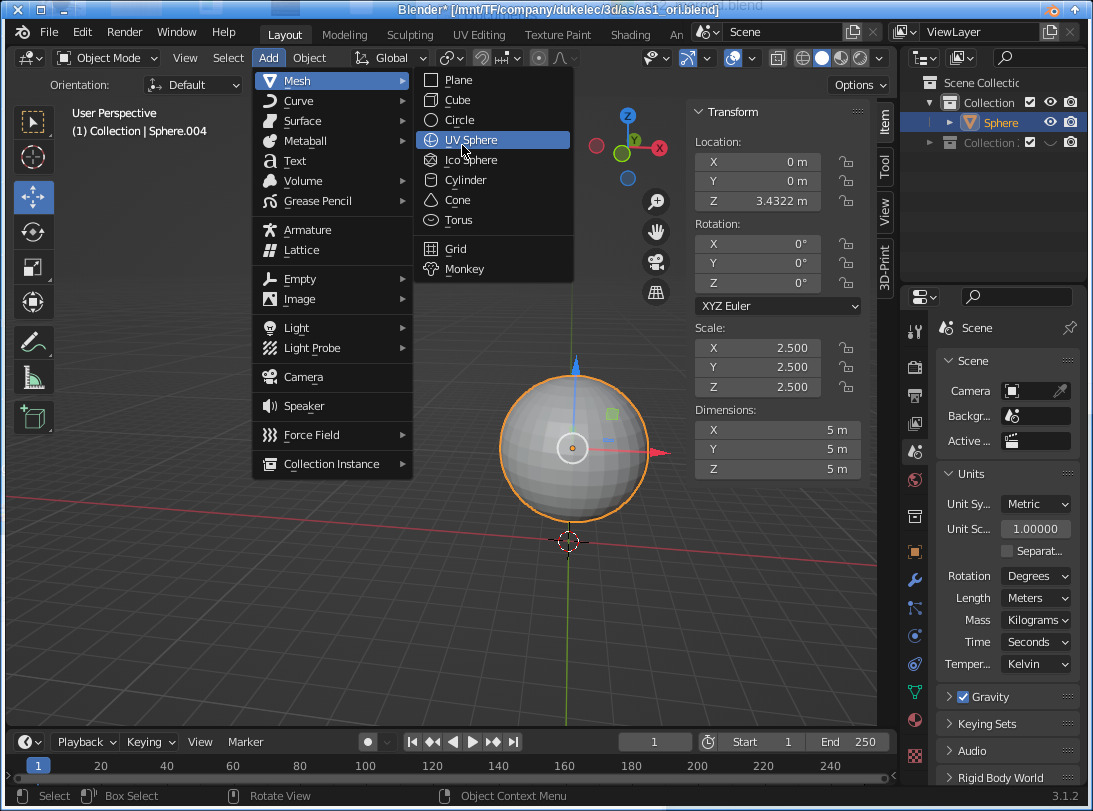
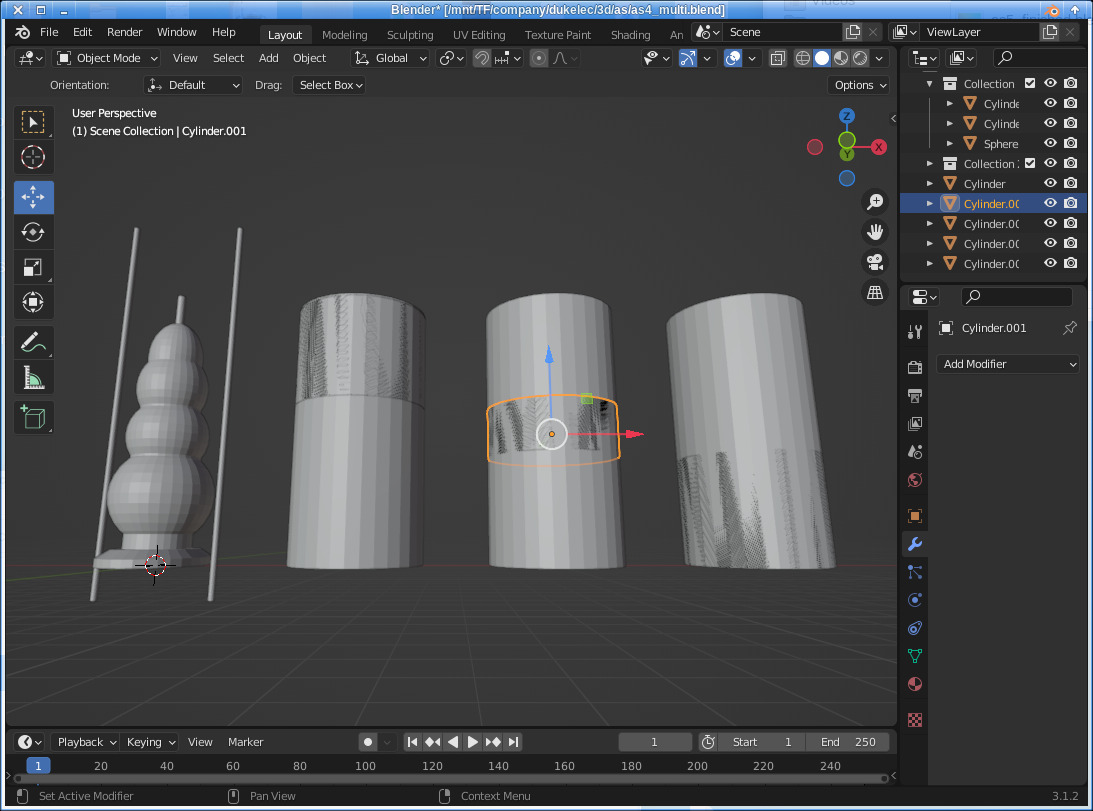
Then add Spheres and Cylinders, and press N to display the Transform panel to precisely set the coordinates and size of the selected object. (The unit is not important and can be specified when the final export is made.)
Moving the position is more easily done by using the G shortcut, then entering X Y or Z letters, and then using the keyboard to enter numbers for precise movement.
(When entering X Y Z letters, you can use the Shift key, for example, Shift + Z to select the XY plane.)
(Similar to the G shortcut, S is to change the size and R or double R is to rotate.)
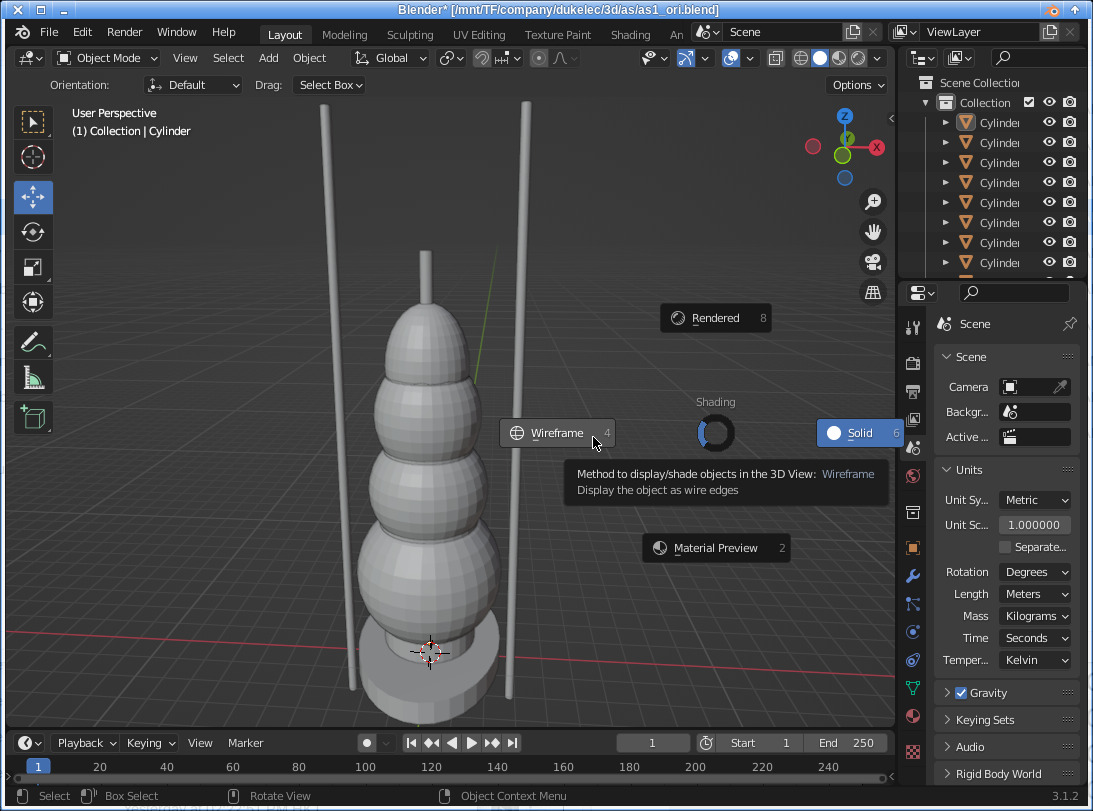
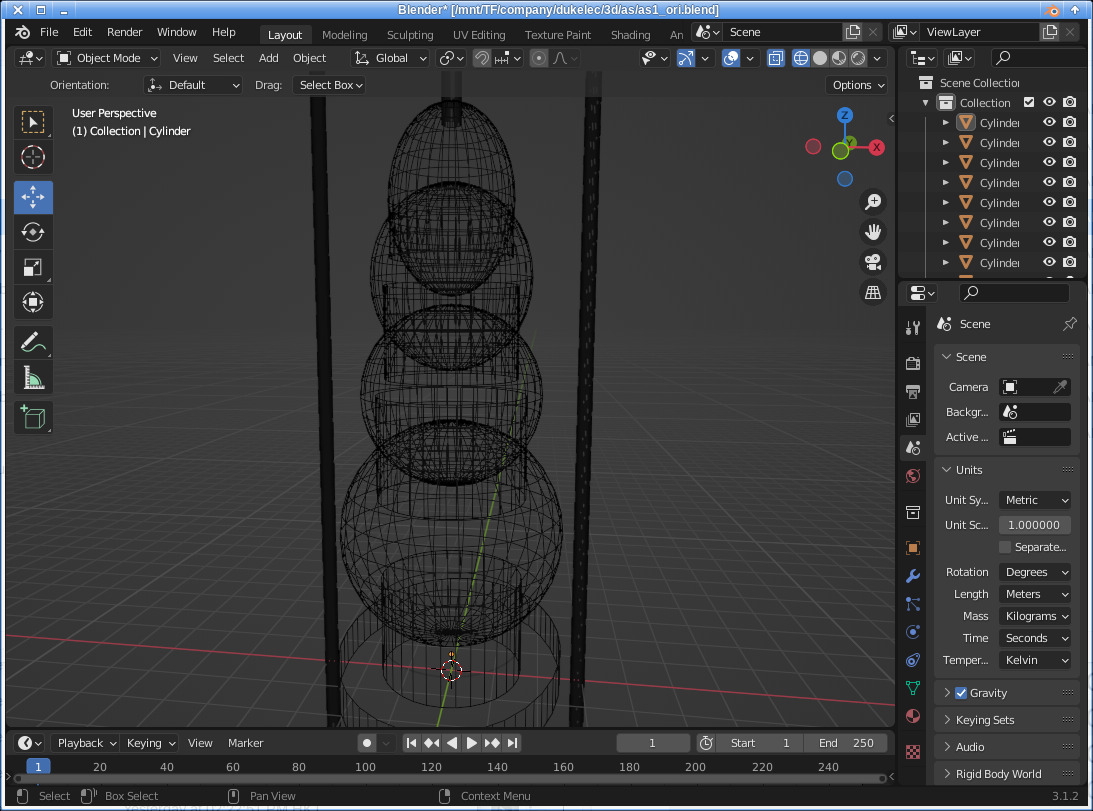
The desired shape has been assembled below and you can switch to the Wireframe view at any time to see the hidden details with the Z shortcut.
(In the edit mode mentioned later, you can also switch to Wireframe view in order to select targets that are not visible from the current point of view.)
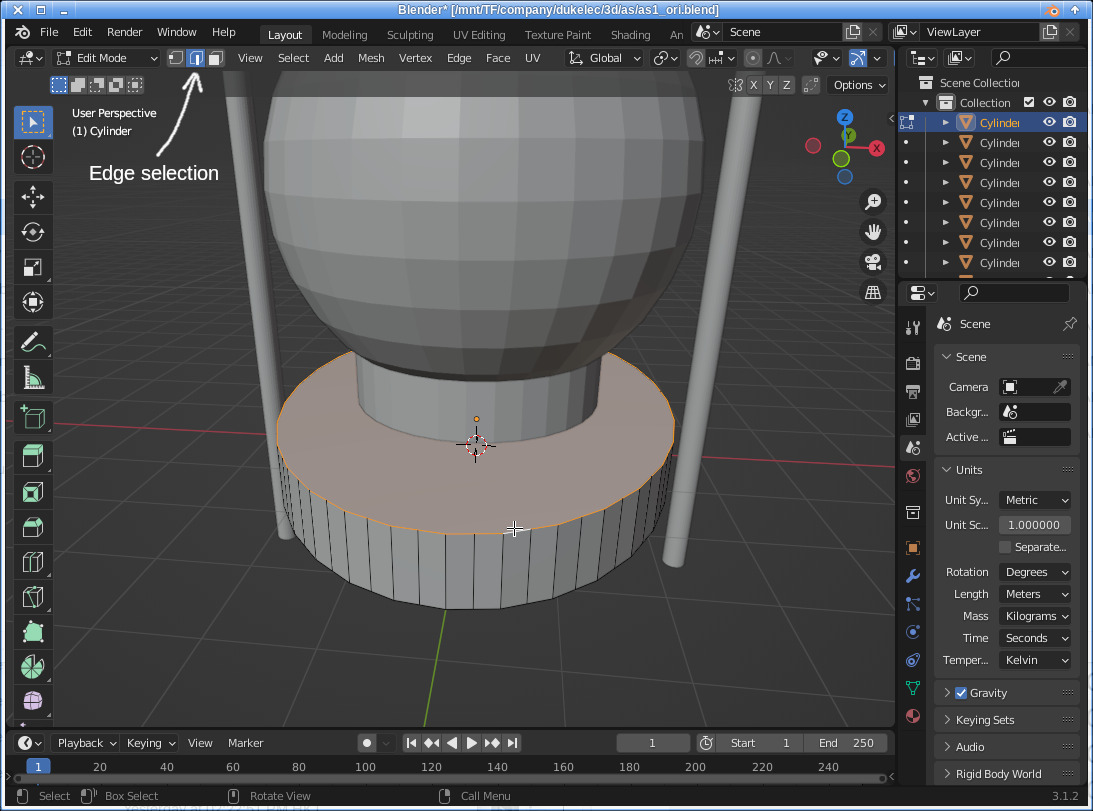
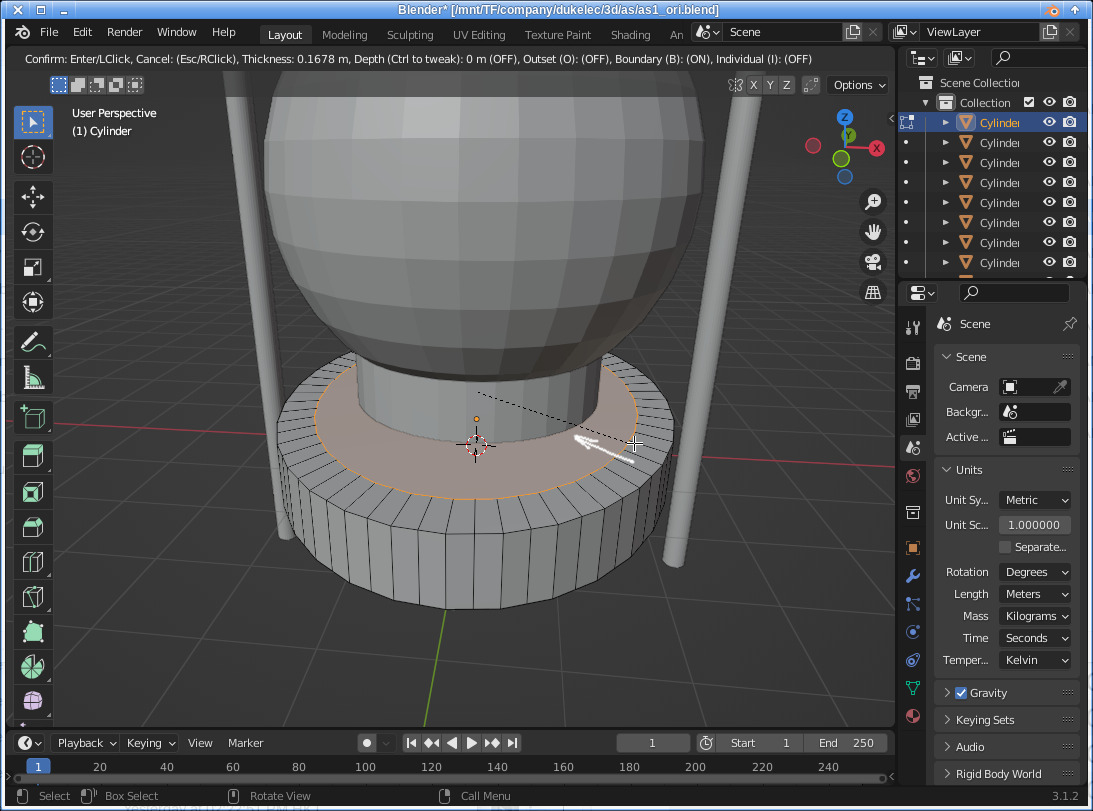
Next we add a bevel to the base. First select the base, then switch to edit mode by the Tab key.
Hold down Ctrl + Alt (or Shift + Alt) and left-click to select the circle in the figure:
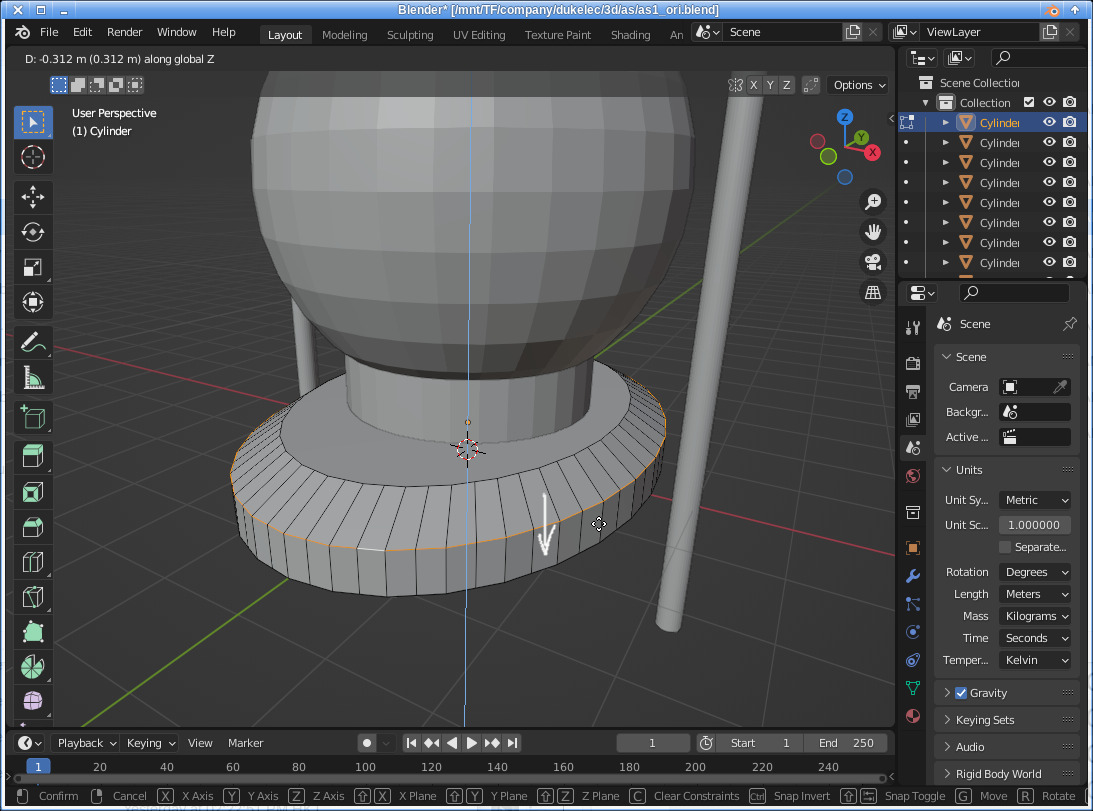
Then use the Inset shortcut I to create a new small circle:
Finally, you can move the original circle downward, using the G shortcut and then the letter Z to limit the direction of movement:
There are many editing methods, the above is just one of them.
In fact, the easiest way is to select the circle and create a bevel directly via Ctrl + B.
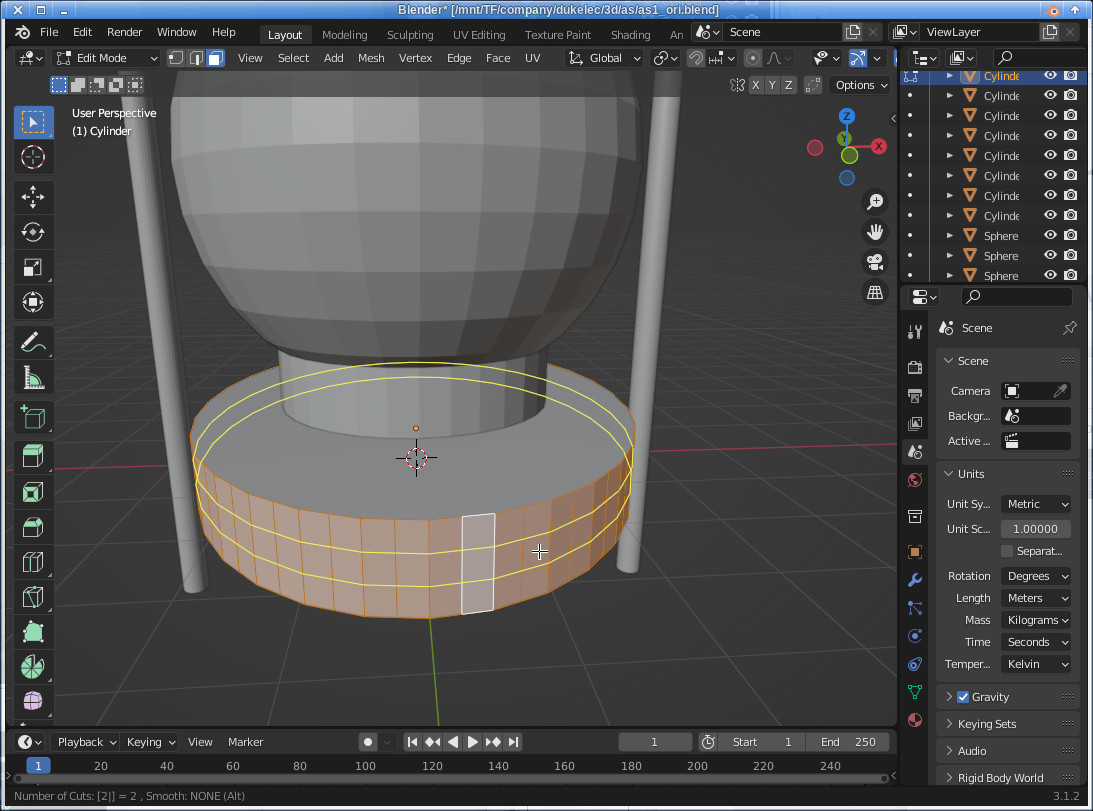
Another common method is: adding edges via the "Loop cut" shortcut: Ctrl + R.
By default one edge will be added, you can enter a number or scroll the mouse wheel to modify the number of additions.
Moving the mouse allows you to select the direction of the added edges (horizontal or vertical).
("Loop cut" will normally cut as far across as it can. If you want to avoid cutting some poly, hide it first by press H, make the cuts, then unhide everything by press Alt + H.)
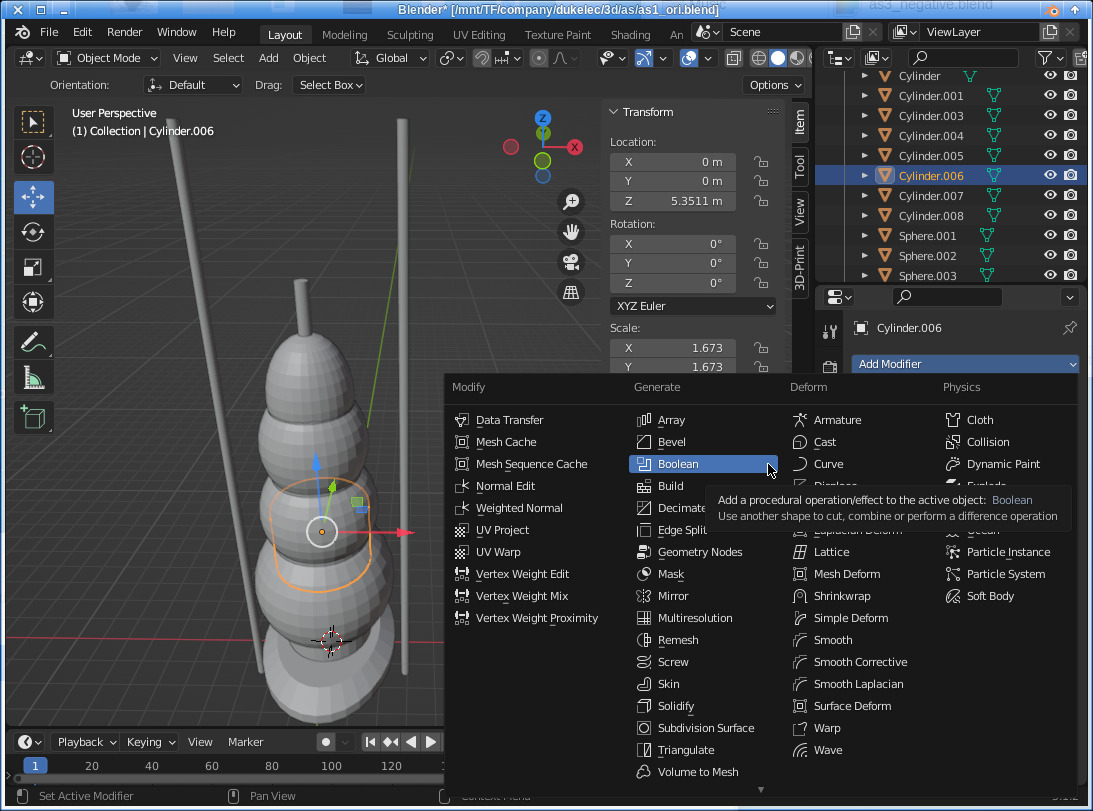
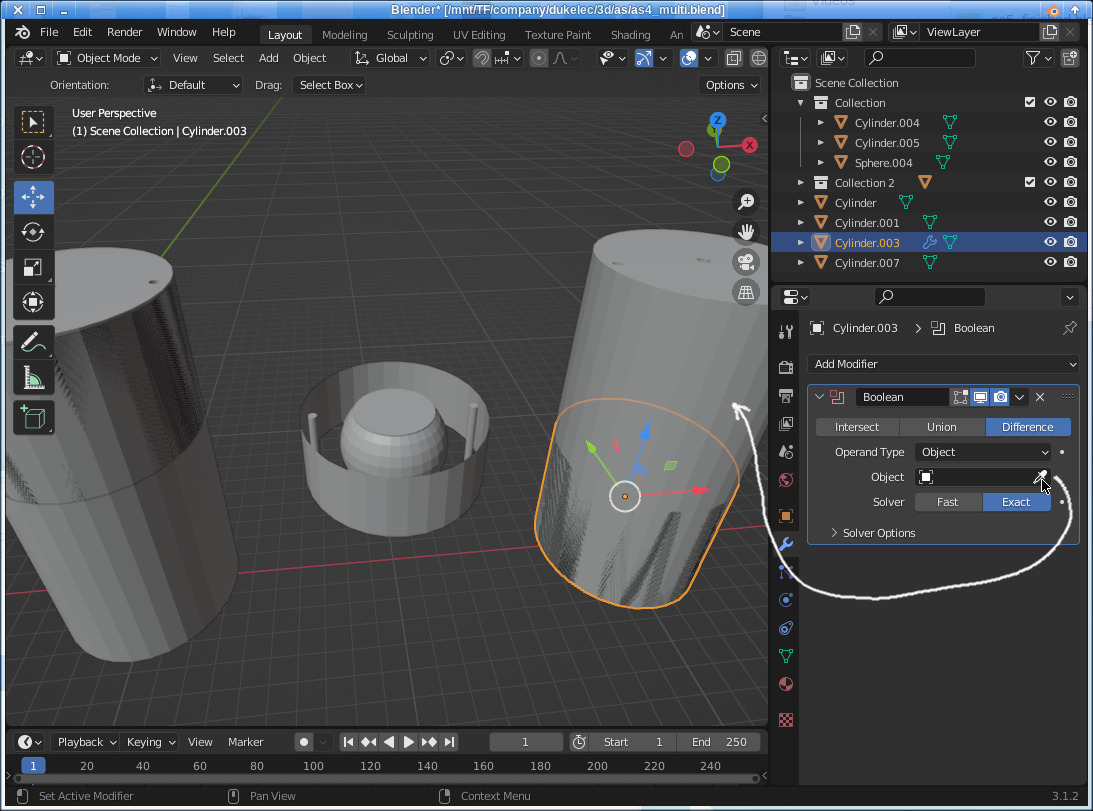
Next, to facilitate subsequent operations, we need to combine the connected objects into a whole by Boolean operations:
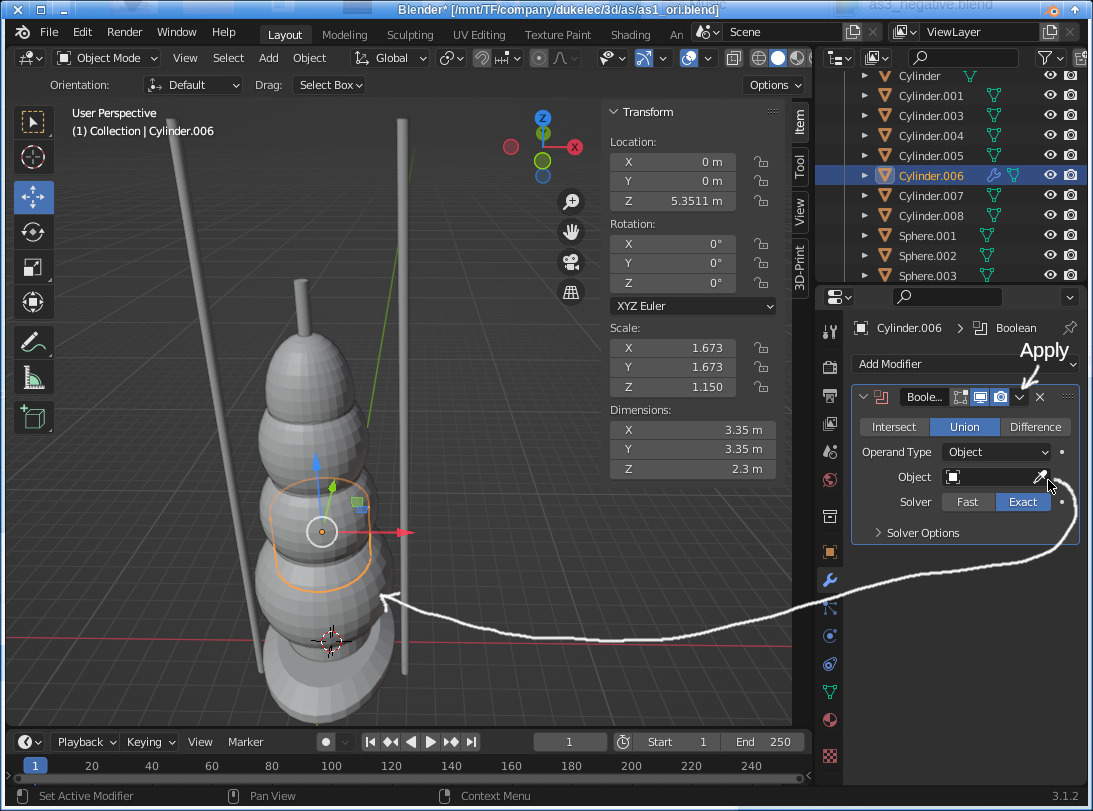
After apply, we need to delete the duplicate objects. Repeating the above operation, the final result is:

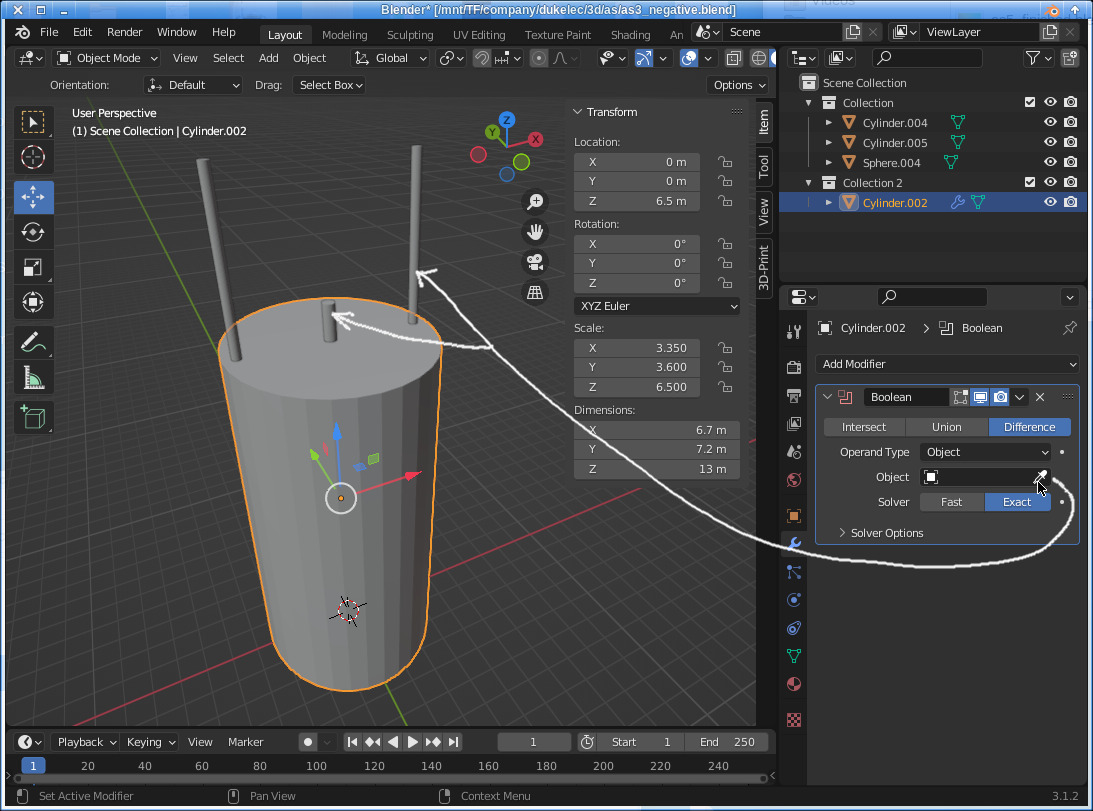
Next, create a Cylinders and get the inverted mold by the difference operation of boolean.
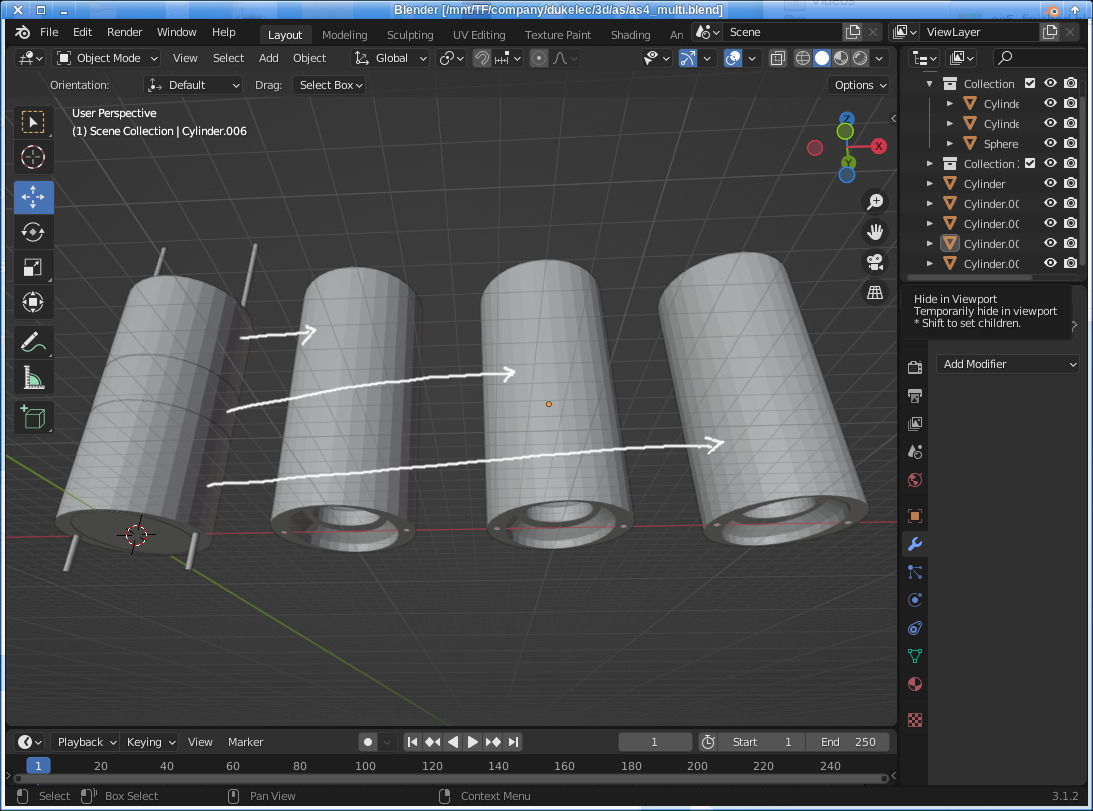
In order to facilitate the demoulding, we have to cut the inverted mold, which can be cut in half in radial direction. To make the edges smoother, I choose to cut them into 3 parts in the axial direction.
Create three new solid Cylinders of the same size as in the previous step, but with different heights and positions, and then move to each of the three identical inverted molds.
(The same inverted molds are copied by Ctrl + C and Ctrl + V, and then shifted precisely by G with numbers.)
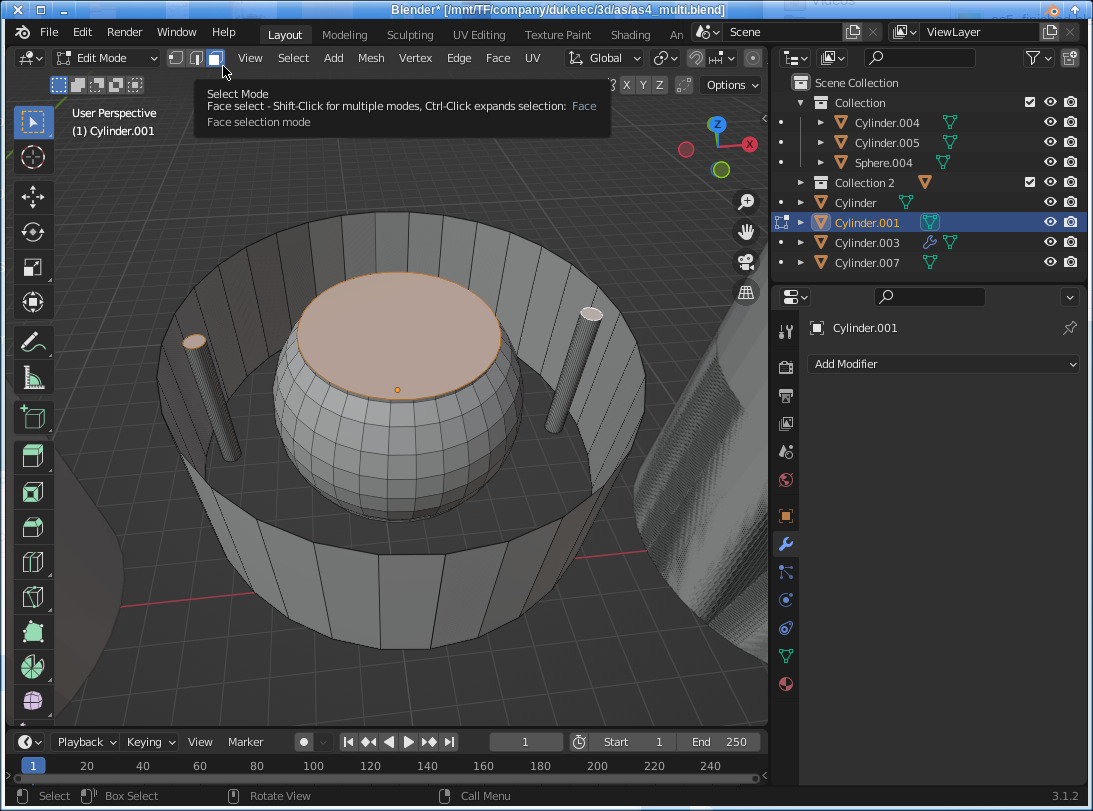
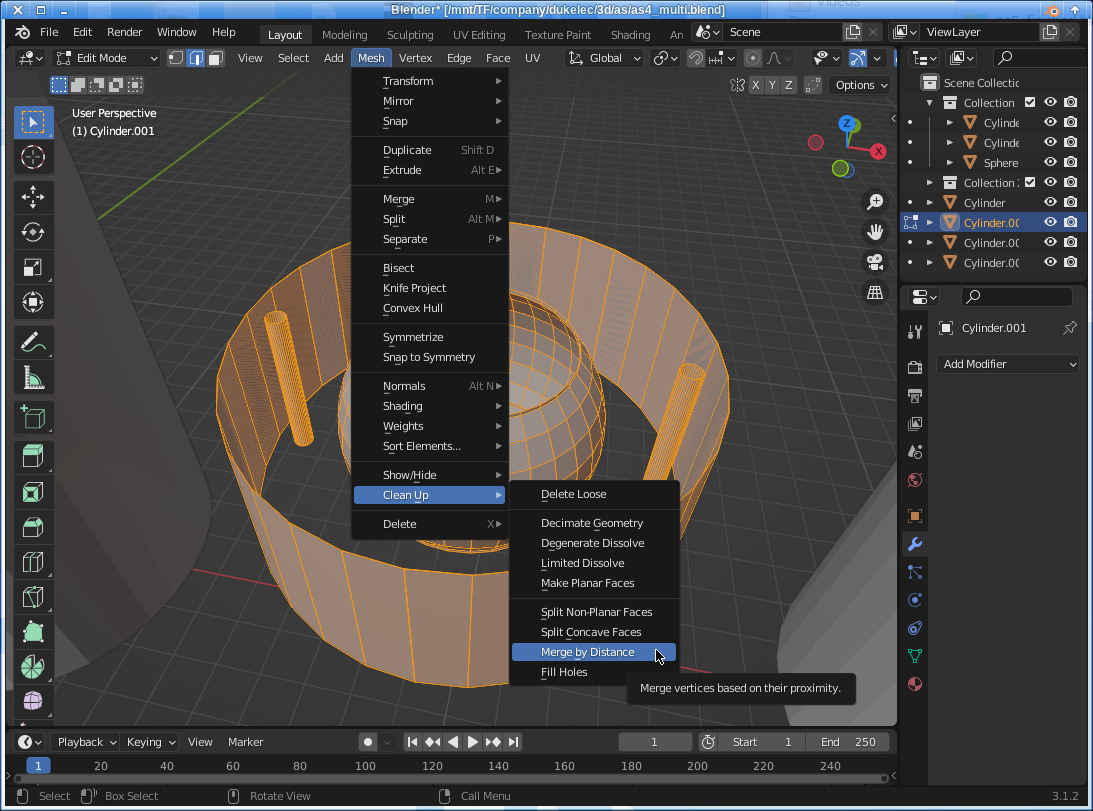
This time, the boolean difference operation is not the result we want, so we need to fix it manually.
Select the target, press the Tab key to enter edit mode, select and delete the faces in the picture:
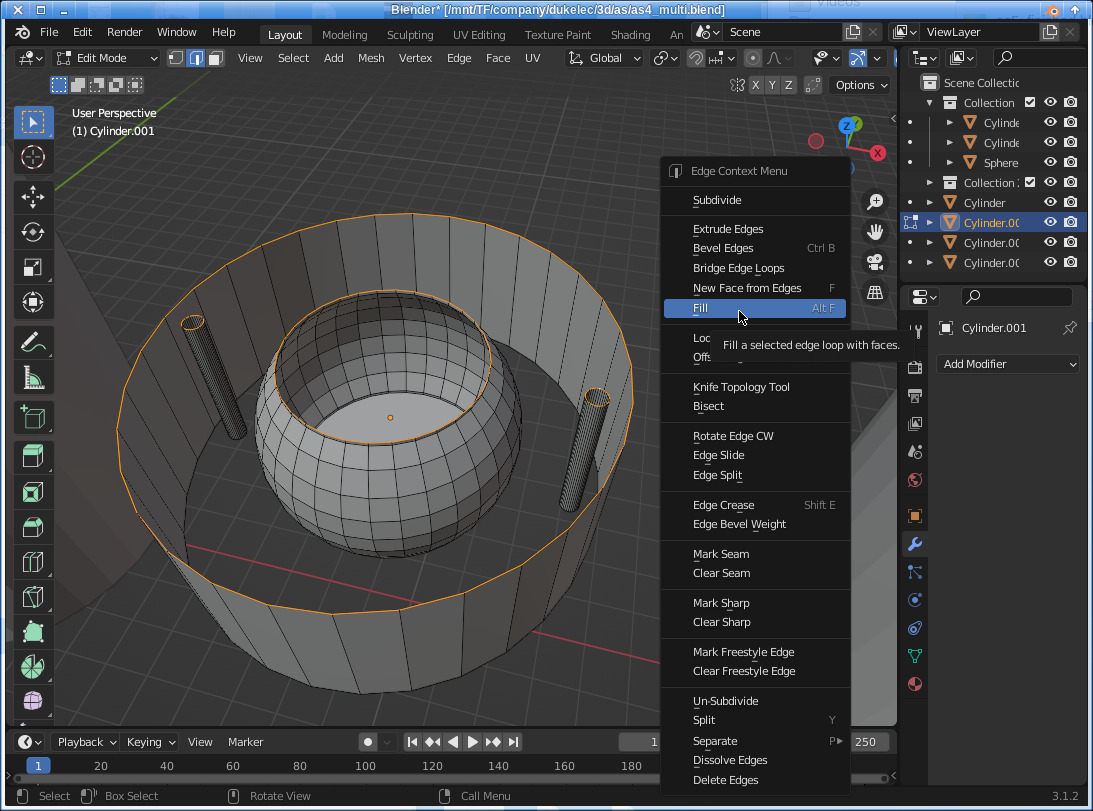
Then switch to the edge selection tool, hold down Shift + Alt, and mouse left click on the target edge to automatically select a full circle. If you can only select a part of the circle, you have to use the "Merge by Distance" to fix it first.
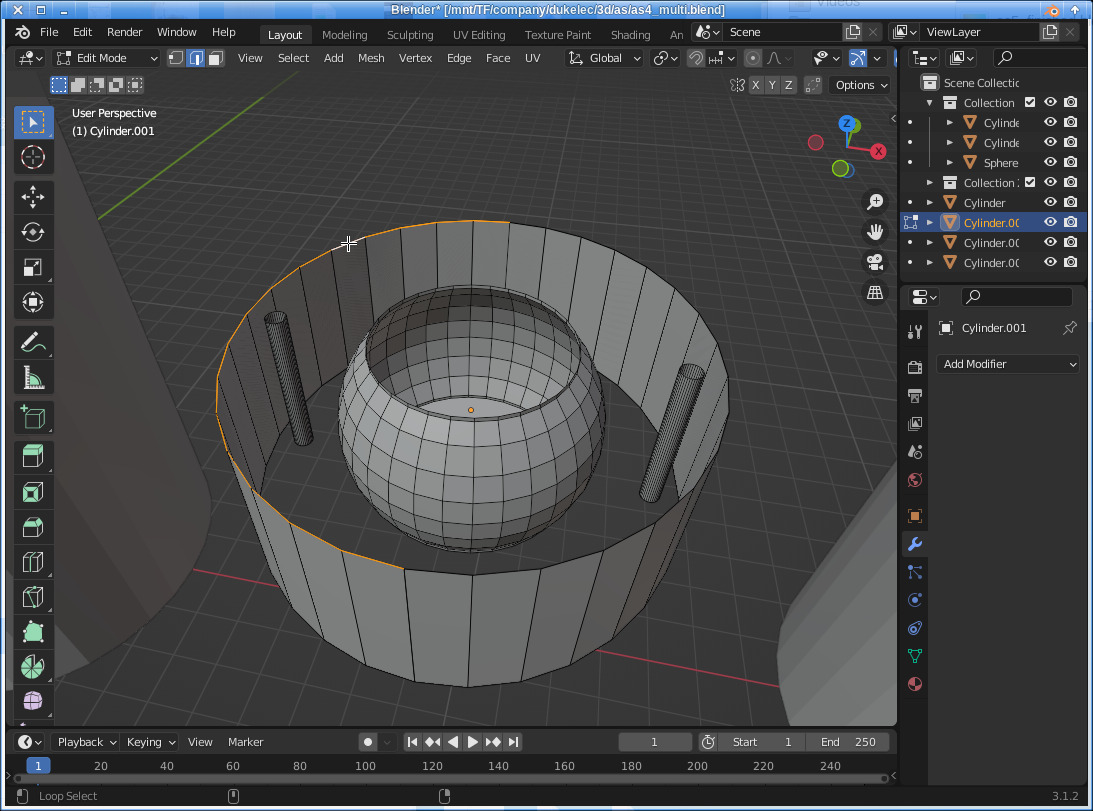
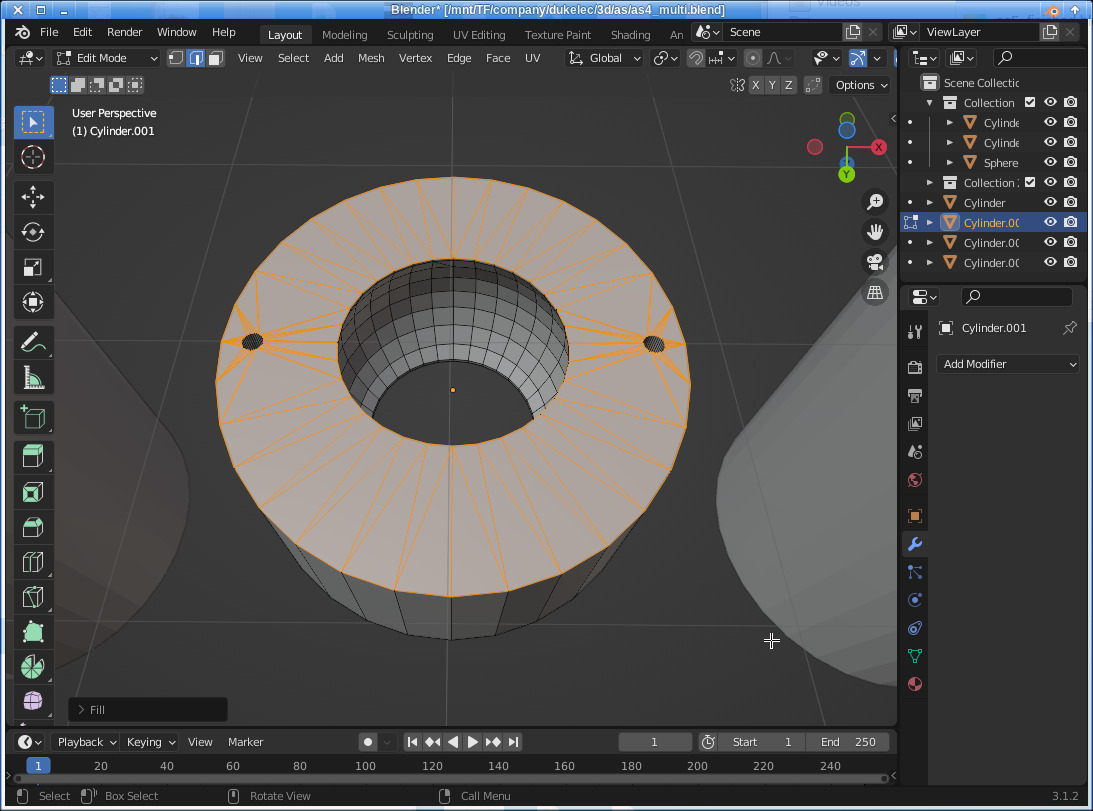
Then create a new face by "Fill" and repeat the same operation on the other side.
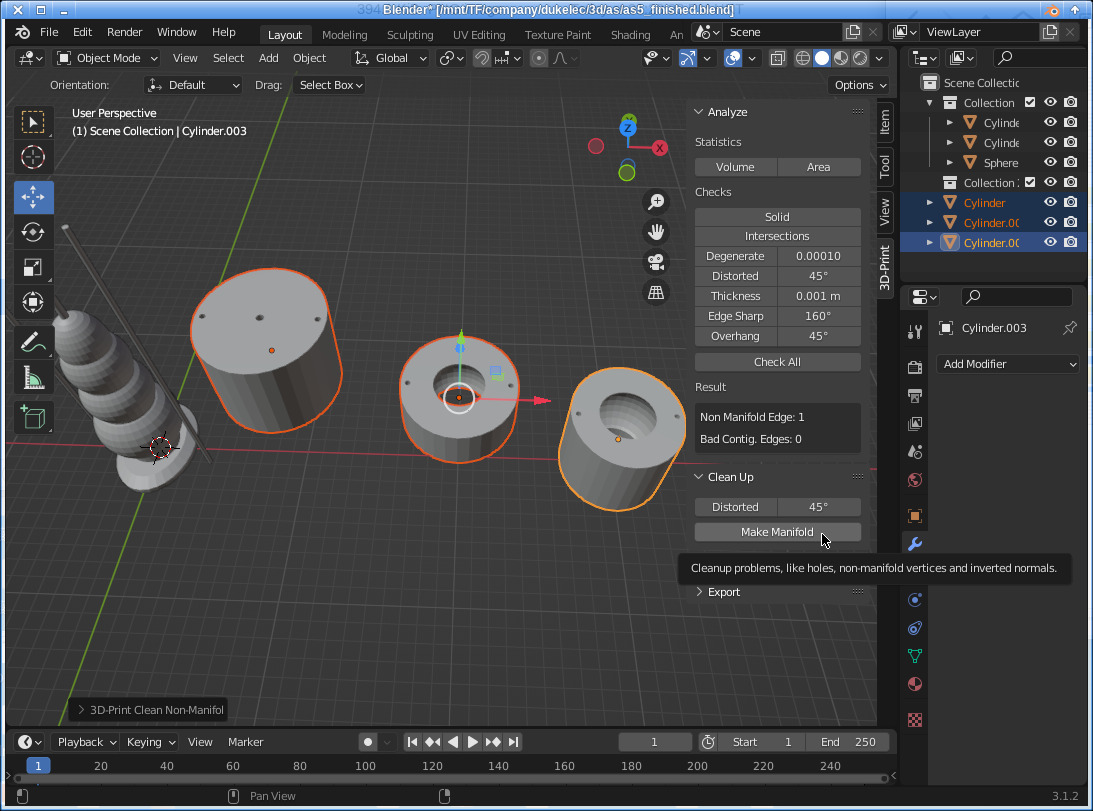
Finally we get the 3 inverted molds after cutting, before exporting, we have to select all of them and use blender's built-in 3D-Print plug-in for auto-repair, just click the "Make Manifold" button. We need to enable the 3D-Print plugin in Blender's settings first.
It is recommended to export 3 objects in sequence, first move the object to be exported to the origin of the coordinates, and delete the other objects. (Please back up your documents first.)
Blender can also do some further smoothing operations, which are not needed here.
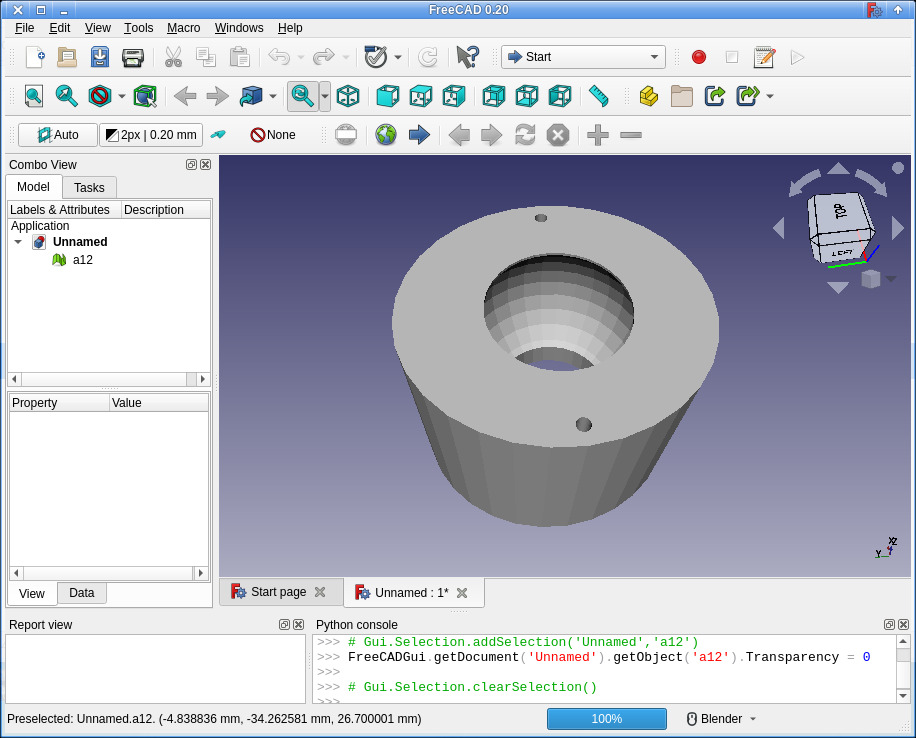
Finally, I like to use FreeCAD to check the exported stl files.
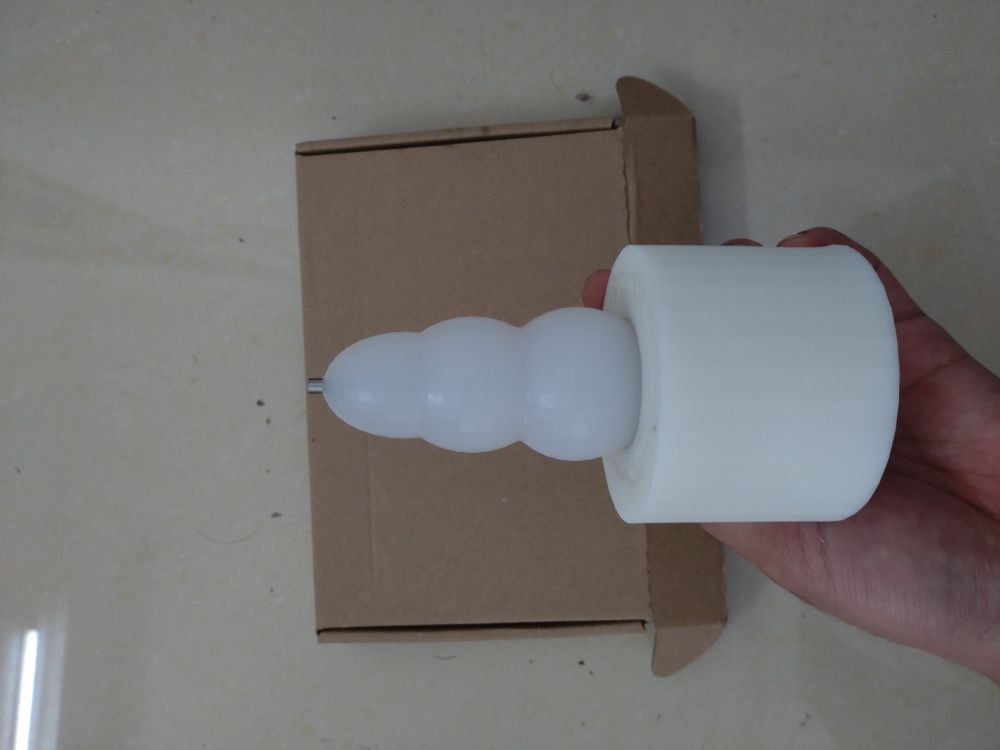
I sent the stl files to the optical curing printing service factory. After I received the goods, the following assembly started:
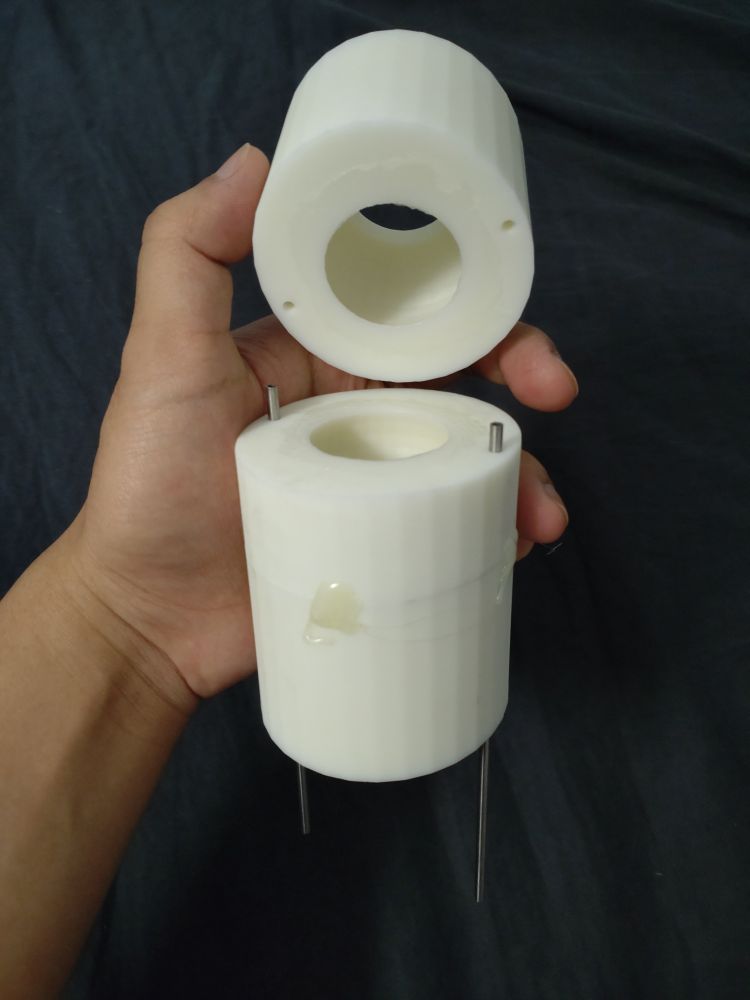

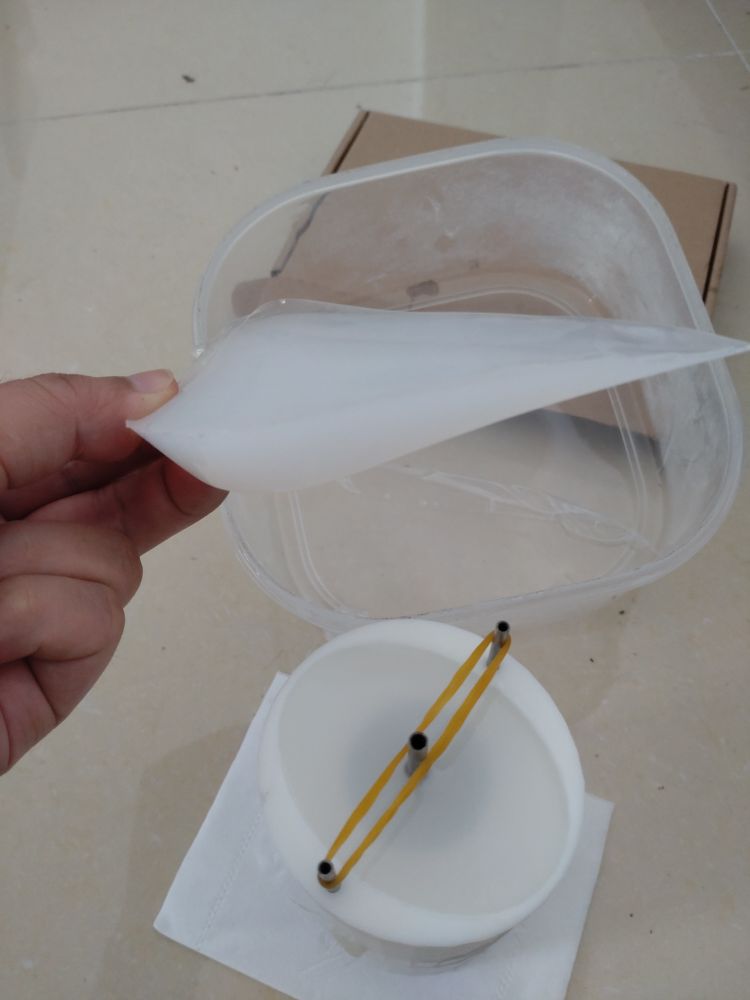
The inside of the inverted mold and the connections are coated with petroleum jelly for easy release and to seal the connections. Only a small amount can be applied to the inside of the mold.
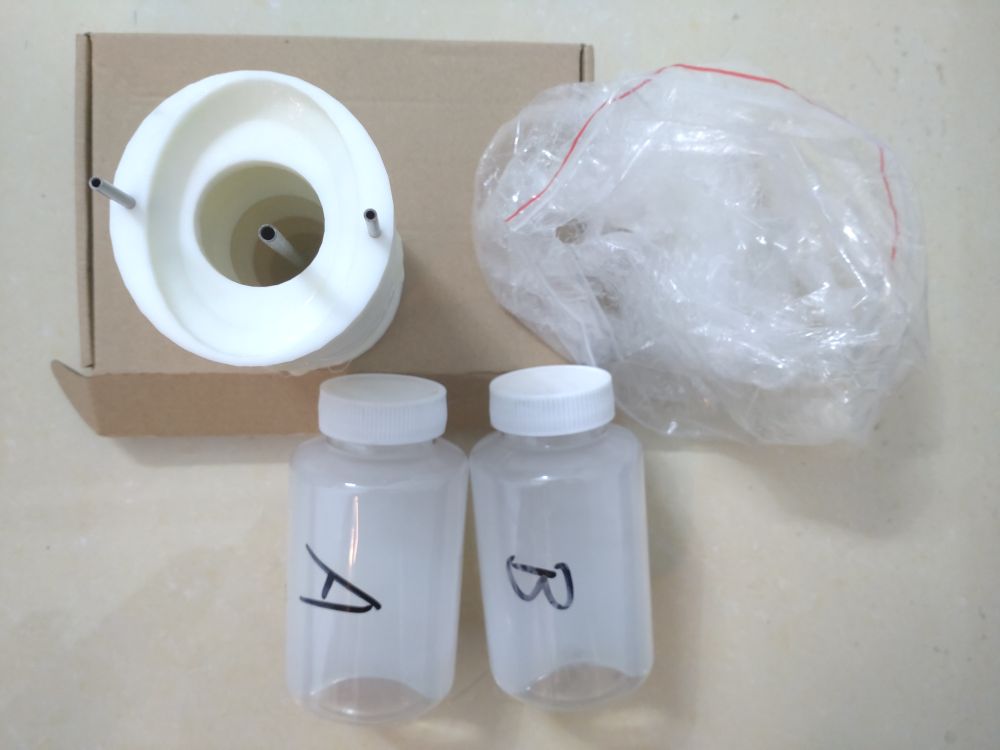
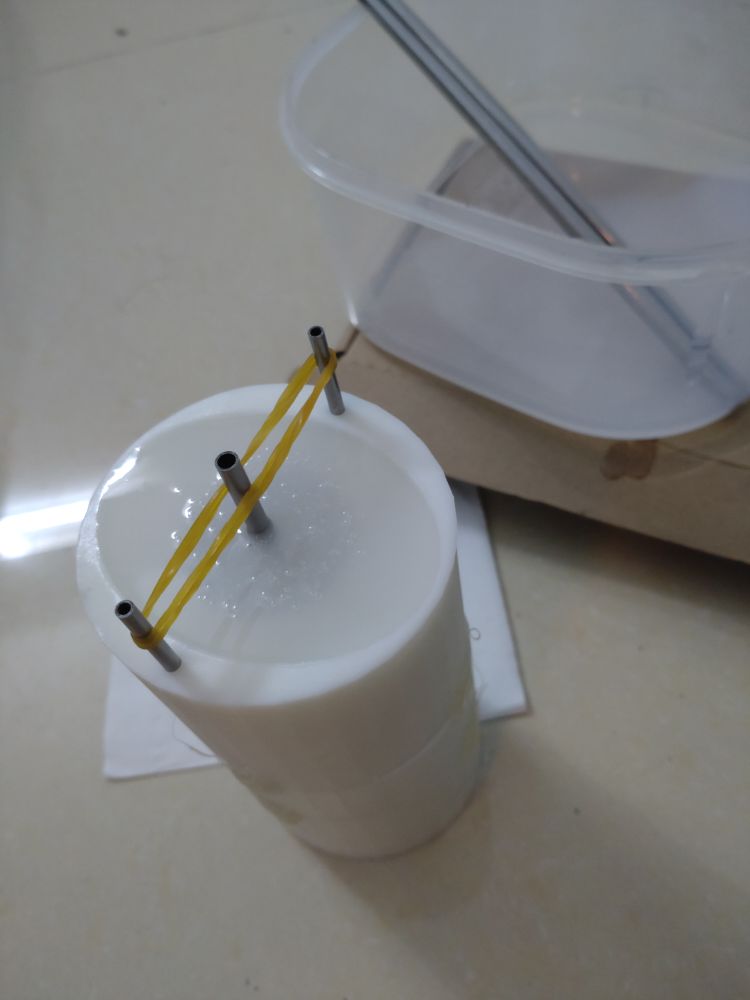
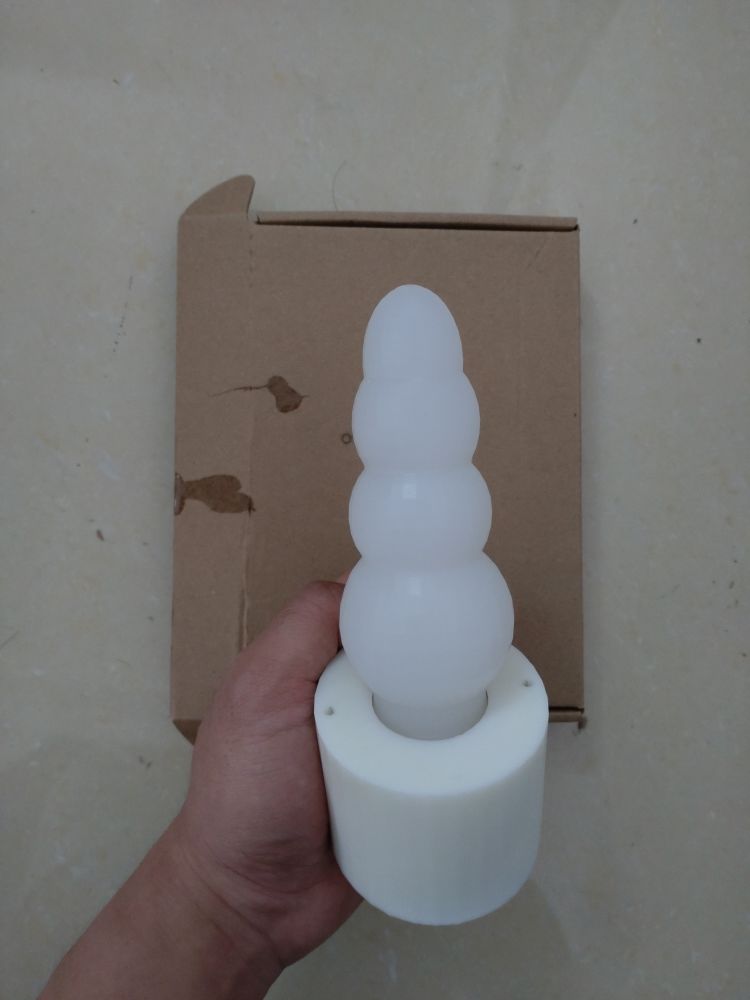
Mix 1:1 silicone ingredients and pour into the pouring mold. After pouring, it is recommended to stir in the inverted mold to speed up the elimination of air bubbles.
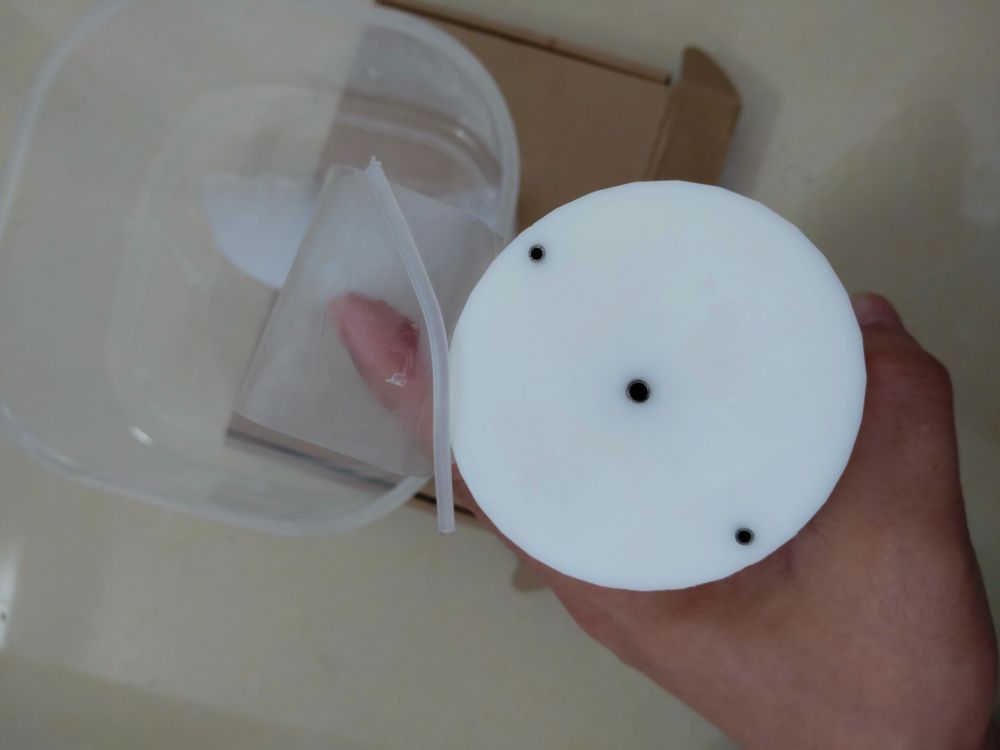
After 10 hours, the remaining silicone material was formed.
The curing time of silicone material is 12~24 hours. The area around the small hole in the pouring mold does not seem to be dry, so in order to achieve better results, wait 30 hours before starting the demolding operation.
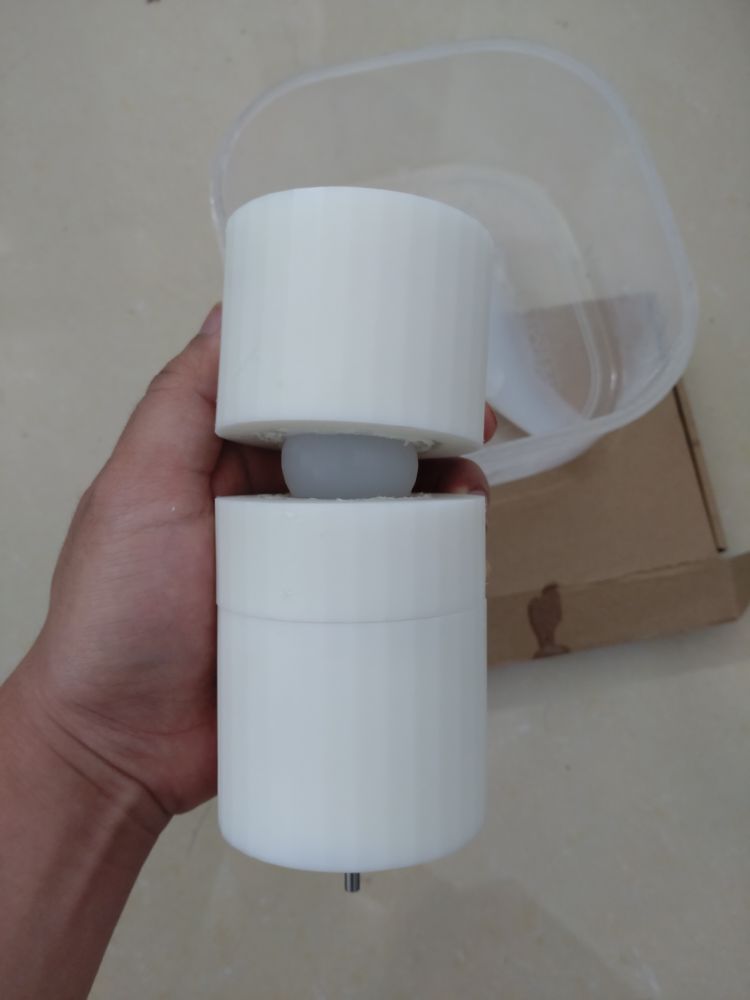
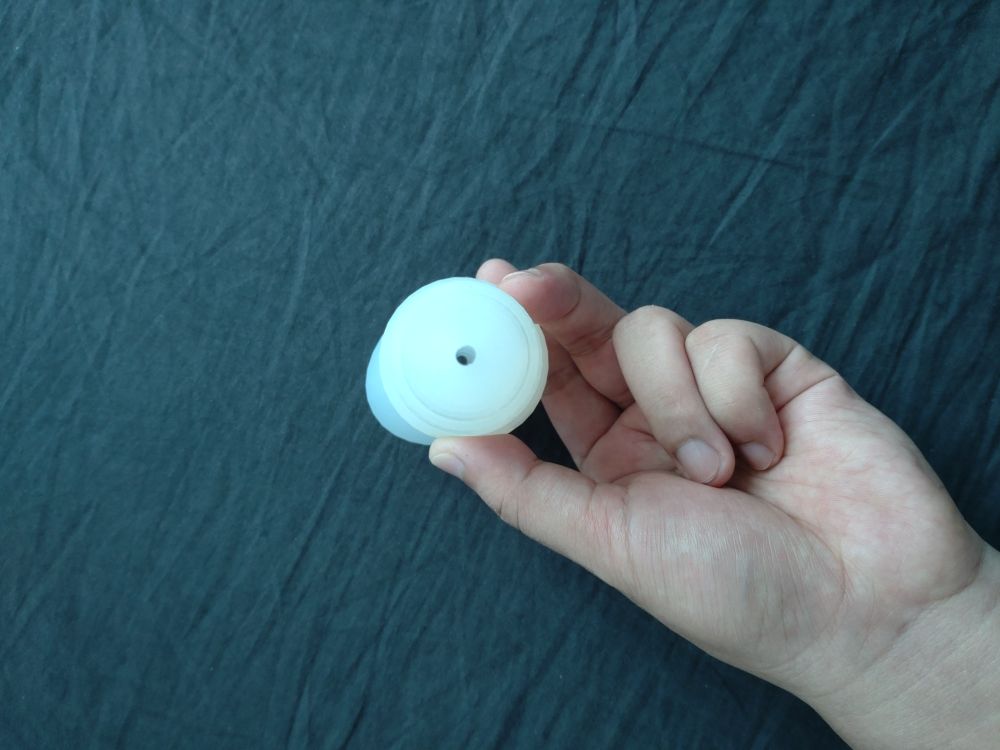
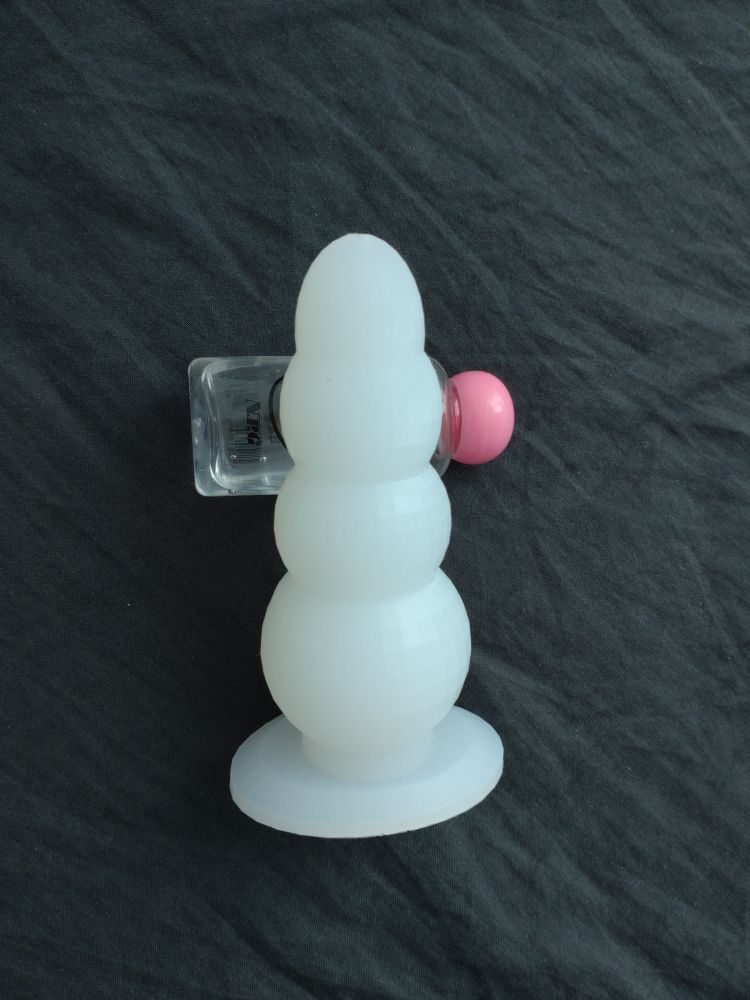
Silicone rubber removed from steel tubes:
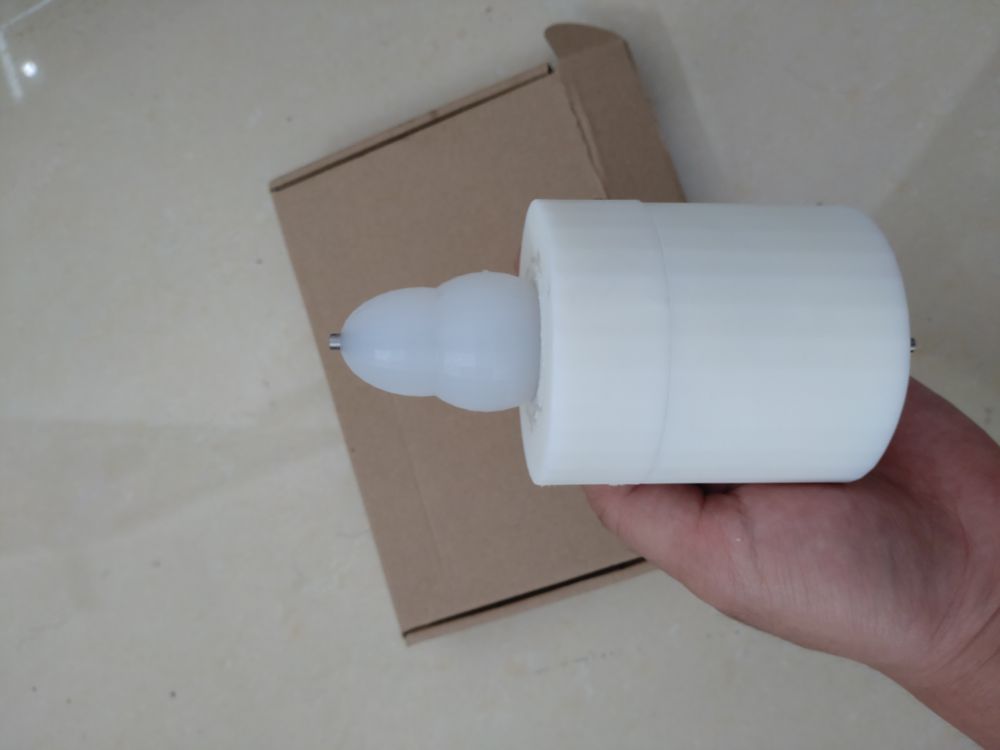
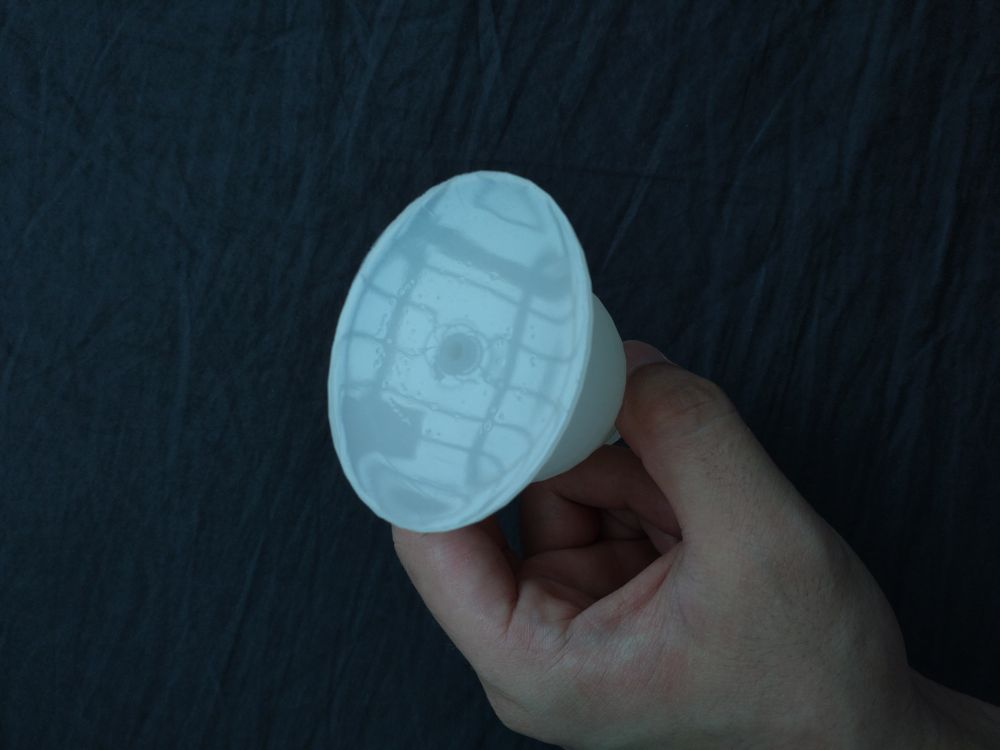
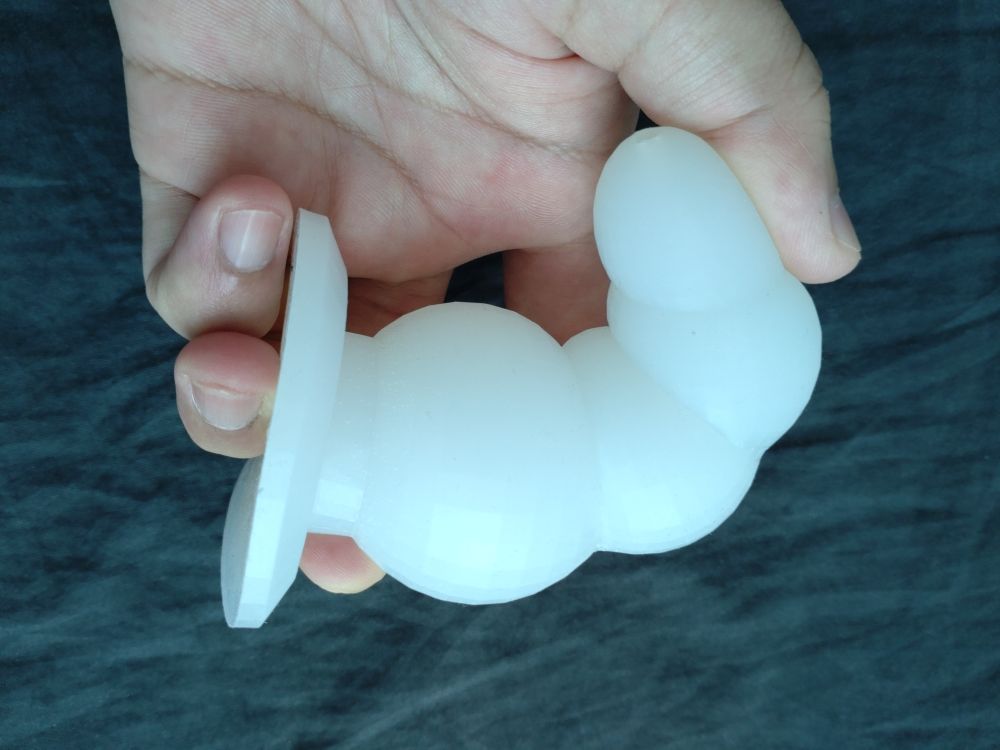
The last ball is a little difficult to take out, the top is pulled while the bottom has to be pushed:
The same method is also suitable for making other silicone things in daily life.
Blender file: finished.tar.bz2
To learn more about Blender you can watch Blender Guru's video tutorials, and I recommend downloading the "Blender Keyboard Shortcut Guide v2" pdf document summarized by Blender Guru.
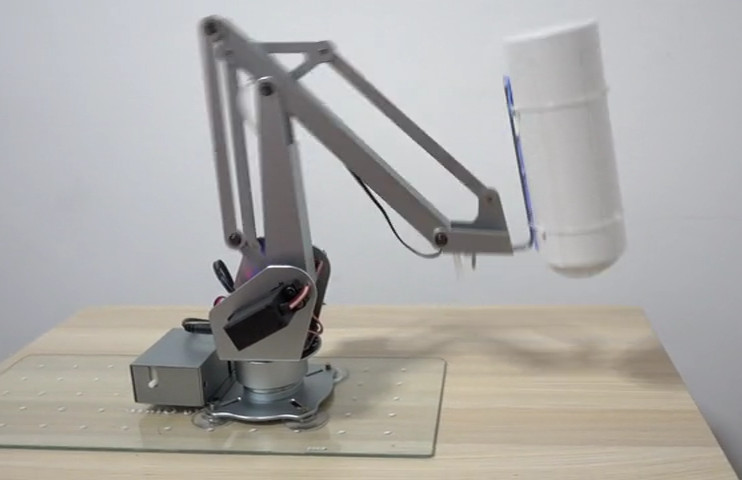
Finally, by the way, I would like to show the sex robot made with a desktop robot arm years ago:

This work is licensed under a Creative Commons Attribution 4.0 International License.
Comments:
#1, Wednesday, February 22, 2023, Glas Toy <seo.g~@gm~.com> wrote:
Thanks for sharing such an informative post. This post is very helpful for sex life.
Please visit the original link: /diy-silicone-sex-toy